In the last episode I said I’d talk about track power and some isolation issues that I came across, and I will get to this… But first I thought I’d update you on how the fix for the running green flue went. (Last discussed in Episode 7: Playing Sim City Part 1).
Not well unfortunately.
The recolouring the track bed with the same colour scatter as the scenic-mat (see above) worked excellently. However the scatter just didn’t take to the board very well and started to flake off. Disappointing, yes, but not the end of the world completely.
It was always my intention in this project to properly add ballast scatter. In fact, it has already been purchased, hence why in the last Episode I had some spare to make faux wagon loads. The reason I have held back on this plan up until now was I was less confident with a) how well the ballast would stick to the board and b) what I should do about the removable track/board joins
.
At the same time as trying to fix the initial green-running glue I also tested adding some ballast scatter to a small siding to see how well it stuck and what it looked like (My method I will get to..) The result far exceeded my expectations which solves part ‘a.’ Part ‘b’ I was still unsure of but decided to start the ballast process on the rest of the layout regardless.

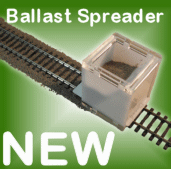
There are available, on the magic of the interwebs, a tool that will help spread the ballast evenly. This looks like it will achieve us excellent results, however it spreads ballast between the sleepers and between the running rails as well as either side. Whilst this will look realistic, at this stage I do not want to add ballast between the running rails. This is purely because I have removable track and what to keep the ‘look’ uniform around the layout. I feel that any ballast between running rails may get stuck in there in the gluing process and then hinder my ability to remove the un-nailed down track needed to split the two base boards for storage.
I will therefore spread the ballast without the tool, and this will also give me a greater degree of control of where I put it.
So, to get started spoon, pour, lump on some ballast to your layout. I used a small paint brush to spread it about evenly.
Next I added some of the specialist scenic cement seen in previous Episodes. Other modellers recommend the mix of PVA and water but there’s something reassuring about the word ‘cement’ that implies heavy duty sticking quality. I used the pipette method to drop the glue onto the dry ballast. Be very generous with your glue here I’d say.
Leave this to dry, it will definitely take upwards of 12 hours so don’t be disheartened if you go back to it after 4 and it feels like it isn’t sticking, it will.
I think it would be possible to leave it there, but to make sure it really is stuck I added a layer of PVA glue over the top which dries clear. This really should help to lock in the individual grains. The PVA layer usually takes a little less time to dry, and again be generous with the helping.
The results look great. I’ve left a few gaps in the ballast at this point - namely the aforementioned removable track sections, which includes the sidings in the centre of the board. I’ve also left out the far edges of the board which are handled in storage frequently as well as a section for a future level crossing.
I can also testify that the ballast has properly stuck as you’ll remember my boards are stacked vertically in storage and I’ve experienced no problems with it coming unstuck. A few lose bits may fall off at first but this is merely excess from the initial scatter.
The whole process should take a few days. Once it was complete I laid the layout out in full and made sure trains were still running ok. At his point I decided to add in the gaps I’d left around the removeable track. It’s just going to be a case of ‘we’ll see what happens’ as I rig and de-rig the layout over time. I was perhaps a bit more sparing of the ballast in these sections to allow a bit of extra give for the removable track. In other regions you can really get the ballast up and in-between sleepers, here I’ve been less aggressive with coverage.
As for the sidings, I’ve gone for a slightly different approach and laid ballast over the whole area. In part an experiment to see if I can apply a similar tactic on the mainline in the future.
A good question raised at the end of this is why have I added ballast scatter at all? After all I have the original scenic-mat, in ballast style, at the bottom of all of this gradually getting more and more covered up. Part of the answer was to resolve the issue of the running-green glue. But it’s also in part to the fact I am new at this, so it’s all an experiment in its own right. Whilst the scenic-mat was adequate to start with, I built up the confidence to add in a more realistic look (the ballast scatter) which we initially ruled out as a primary track underlay all the way back in Episode 3.
So, what I will say is, if/when tackling a similar project from scratch again, I may rethink using the scenic-mat and going straight to the wood with all the scatter – grass and ballast. Ultimately the scenic-mat has been more messy than I thought it would be, both in moving it about and having to chisel some of it off for the roadways. HOWEVER, the good point of having a scenic-mat it is that it has provided a uniform base colour. There may be areas where ballast coverage has been patchy, or maybe the border between ballast and grass is not quite perfect - in these cases instead of wood showing through, the ballast mat shows through. Which is grey. And doesn’t look odd. Modellers may favour paint for the same undercoat effect, but in my case the scenic-mat works just as well.